All of us take photographs and some of us even manage to do an OK job, but not even the best equipment in the world is going to take your photography to the next level.
Photography, like any artistic pursuit, takes practice. Passion and patience is also vital. So while you’re browsing through these 12 amazing photography techniques and tips for beginners, consider these 3 Ps.
Photography’s 3 Ps
Practice
Reading through these photography techniques and tips below is not going to suddenly make you a brilliant photographer. You have to take out your SLR or DLSR and practice. Sure, you might need to invest in a few different tools and lenses, but start small. Before buying new shiny additions, get to know everything about your camera as is.
Photograph. Photograph. Photograph. Review. Then photograph again.
“Your first 10,000 photographs are your worst” – Henri Cartier-Bresson
Luckily we don’t use film anymore hey!?
Passion
Like any hobby, you have to not only put aside the time to do it, you have to want to do it. They say it takes 90 days for something to become a habit, so try taking a photo everyday for 90 days and experience the reward of doing, reviewing, improving.
Sure, having a good eye is important but there’s no point having that eye if you’re not interested in using it.
“The important thing is, you have to have something important to say about the world.” – Paul Strand
Patience
Of course there are photographers who go to crazy extremes. Don’t let them intimidate you. Let them inspire you!
Photographing and photographing well takes patience, so don’t expect magic in the first month. If you’re after a quick start or some ongoing support, there are a number of photography courses that will be of benefit to you.
The act of photography itself can also demand patience. That flower may not be going anywhere in a hurry, but the light does, the dewdrops do and those insects – well they hustle and bustle wherever they please. Don’t sacrifice a potentially extraordinary photo for the sake of a quick snap.
“Photography is my meditation” – Czar Anthony Lopez
1. Underwater Photography
Underwater photographer Sterling Zumbrunn provides the following tips:
- Know how to dive well.
- Get close to animals, carefully and smoothly.
- Shoot upwards towards the surface, not down so your perspective includes more than just the sea bottom.
- Expose things properly.
- Balance light from strobes or video light with the ambient light in the scene. Get comfortable with your camera’s manual mode.
- Be prepared to shoot a lot of photos as shooting underwater is more challenging than shooting on land.
- Shoot in raw then edit photos in Adobe Lightroom/Photoshop.
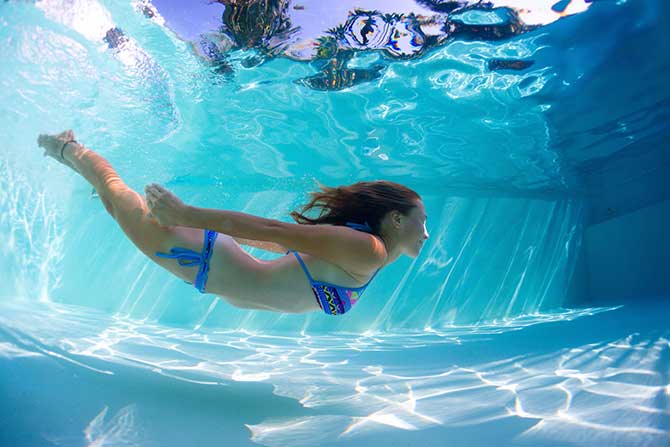
Keen to learn more? Read Zumbrunn’s guide to underwater photography.
2. Black and White Photography
Black and white is the epitome of arty, but how do you pull it off? You have to train your eye to see the world in tones of grey rather than colour. Tricky stuff.
Seeing the world in mono is tricky as colour overwhelms our visual sense. In his guide, photographer Andrew Wilson suggests looking at textures, tonal contrasts, shape, form and lighting.
Not all subjects are suitable for black and white, so it’s important not to think you can magically make an image look more ‘arty’ by making it black and white. The cornerstone of some subjects – whether it’s a human subject or a landscape – can be colour.
But if the beauty of your subject is more about texture, contrast, form and light then consider shooting it in black and white.
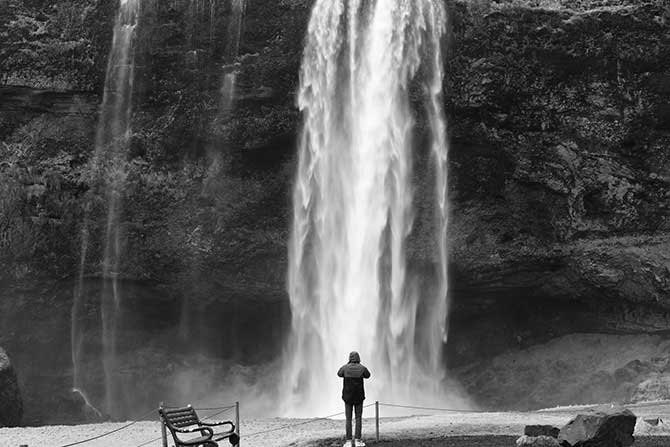
Accomplished black and white photographer Ansel says “There are always two people in every picture: the photographer and the viewer.”
While it’s important to consider your subject, be sure to consider what you’re trying to achieve for yourself and your audience. Your subjects don’t exist in black and white. Your mind’s eye does.
3. Motion Blur Photography
Motion blur involves capturing a view of a moving subject as a still-ish figure while everything else in the background is a busy blur. Wildlife photographers are masters at this. Think cheetahs, deers and kangaroos bounding along.
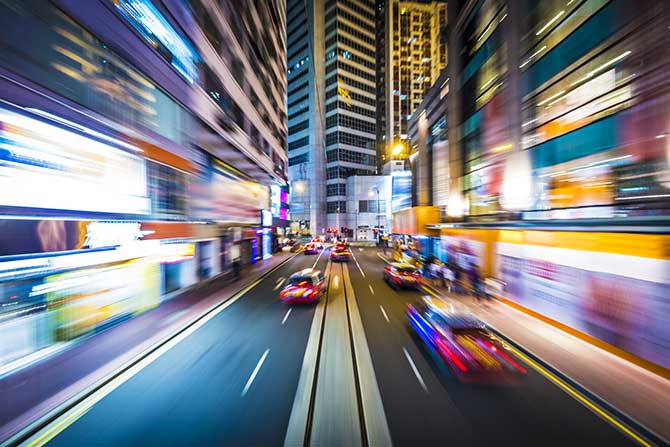
Kate Neill suggests the following tips:
- Be ready to take the shot as you only get one chance. Be aware of which direction your subject is coming from and ensure the background is suitable.
- Make sure you have the correct camera settings ready. Neil says Motion blur is primarily about your shutter speed so use shutter priority mode with it set to 1/60s for late afternoon or early morning light.
- Use a tripod for stable tracking. Keep a navigation point on a particular spot on your subject or shoot a sequence of rapid photographs as you track it.
- Set the Focus to S-AF or Servo so that the camera continues to focus regardless of whether your finger is on the button.
- Choose a lower ISO, 200 or 400, as you will be able to have your shutter speed open for longer without letting in too much light.
Read more of Neill’s tips on how to capture motion blur in a photograph.
4. Panoramic Photography
Everyone loves a panorama! So much so that even some smartphones have built-in panoramic or ‘pano’ settings.
Panoramas are all about capturing a wide angle view. We are loving what we are seeing with our own eyes so much that we want to capture it as a still scene to be remembered forever.
That is why, at the Canvas Factory, our panoramic prints are very popular.
We think it unfair that it can’t fit into our standard camera lens, so – with panoramic photos – we push the boundaries of what’s possible.

Some panoramas are easier to shoot than others. For example, it’s easier to piece together a picturesque landscape than it is to match up a cityscape.
To learn how to shoot the perfect panorama check out these panorama photography tips for nature photographers.
5. Tilt-Shift Photography
Think mini! Think cute! Think quaint! Think quirky!
Tilt-shift photography involves the use of movement to simulate a miniature scene. The tilt side of things involves rotating the lens plane relative to the image plane. The shift is the movement of the lens parallel to the image plane.
It’s how you get a city street looking like it’s full of lots of little lego characters and a village full of monopoly houses. It’s also how you get a football match looking like it’s full of funny little action figures.
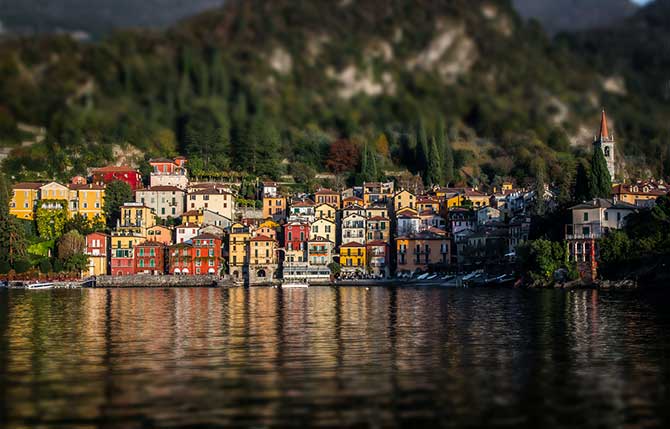
The best thing is, it’s all achievable as part of the photo editing process. It requires an artistic bent and some technical talent.
Here’s an intro to tilt shift photography and here’s another great tilt shift photography tutorial.
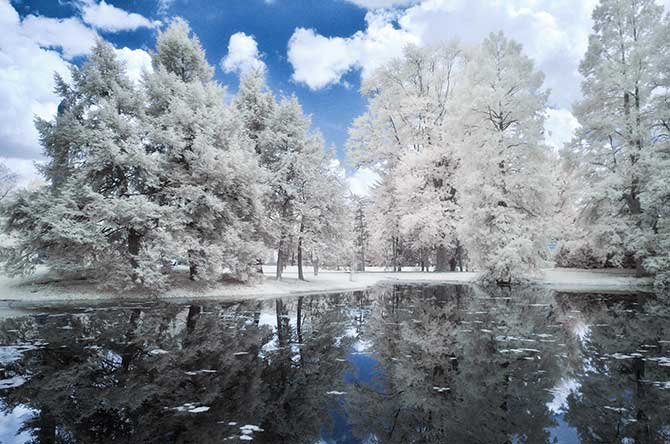
6. Infrared Photography
The good news is you don’t have to buy an infrared camera to shoot infrared. The bad news is you do have to modify it and that requires, well, risks. This article shows you how to DIY your own infrared camera.
In short, to shoot infrared you need a digital camera, but an SLR isn’t ideal. Your best bet is purchasing an unmodified, visible-light digital camera with an infrared filter. Learn more in detail here.
Shooting in infrared comes with a whole series of different Photoshop tips. This tutorial will get you well on your way.
The results will blow you away.
7. High Speed Photography
This photographic trick is always a feast for the visual senses. This technique is all about defying gravity and there are few things that say ‘wow!’ more than that one!
One advantage of shooting high speed photography is that you’re shooting something that has a predictable sequence. That is, you know what your subject is going to do before it does it. That said, it does require refined skills in observation and perfect timing.
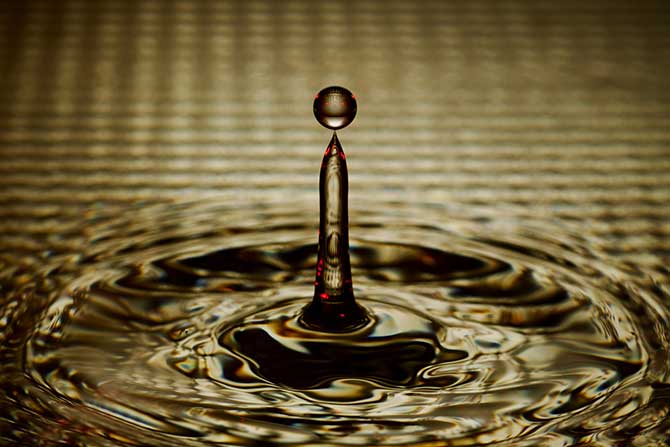
The easiest way to freeze motion is with the shutter speed. The idea is to use a very short shutter speed. Some cameras can take pictures with shutter speeds up to 1/8000s. Incredible! Depending on what you’re shooting, 1/1000 can work fine. This will capture 1 millisecond of the movement. That said, as fast as possible is the key here.
This method is called the ‘Shutter Method’ and you can learn more about this and all about the ‘Flash Method’ at Picture Correct.
8. Sunrise Photography
It’s so easy for the amateur photographer to capture sunsets and sunrises which is a relief because their beauty is insurmountable. When we’re out there enjoying a sunset – particularly if it’s in a magical location or a rare spectacle – we want to remember it forever.
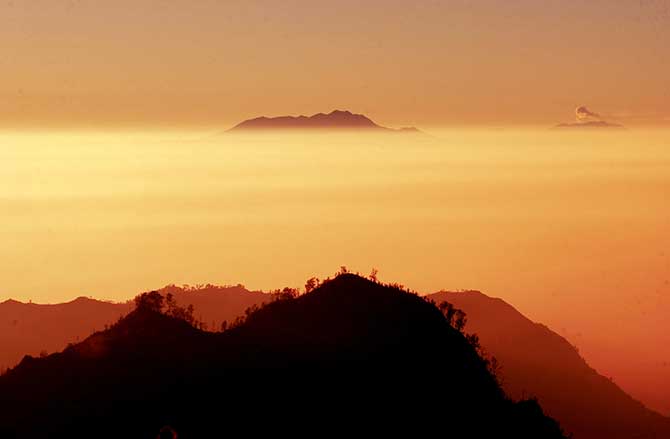
You will want a 20 second shutter speed, an ISO of 100, a range of lenses and shade to shoot from. This Digital Photography School article will give you further guidance.
9. Rain Photography
The key to good rain photography is to not be too precious about your equipment. Sure, there are certainly risks and it’s up to you decide how far you go. Press photographers take these risk all the time and, contrary to popular belief, their bosses don’t replace their camera equipment at the click of a finger. So consider the risks, but understand that cameras are often hardier than we make out.
If you’re planning to photograph out in the rain, invest in a lens cloth and a lens hood and protect as much of your gear as you can under shelter and under your raincoat.
If you want to hide the rain from your picture, don’t use the flash. Direct flash lights up the rain drops, in an ugly way! Instead use the natural light available to you. If you want to enhance the appearance of rain in your picture, use a long lens. A shallow depth of field and fast shutter speed will still the rain drops. A sun shower is your best friend. Shots that are backlit with sunlight create a sense of whimsy.
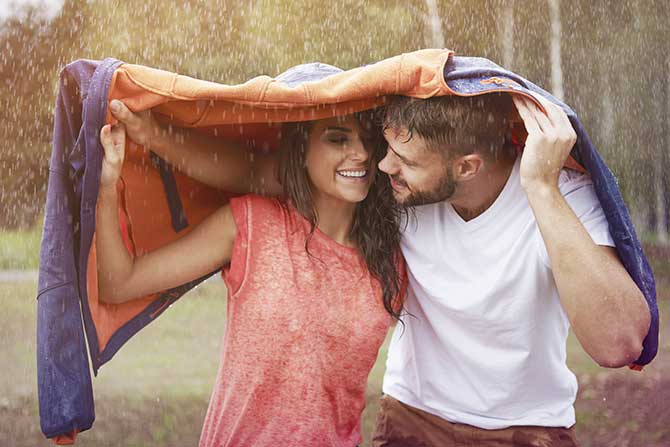
Check out more beautiful raindrop pictures and learn to take them yourself at the School Of Digital Photography.
10. Landscape Photography
Wall print anyone? You can search for ‘landscape photography’ in our online database of 20 million images or you can learn how to do this yourself and print your own landscape to canvas!
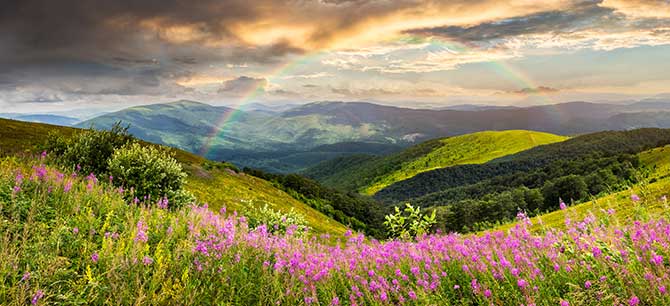
Landscape photography is harder than it looks and these two tutorials will give you the tips you need to succeed:
11. Abstract Photography
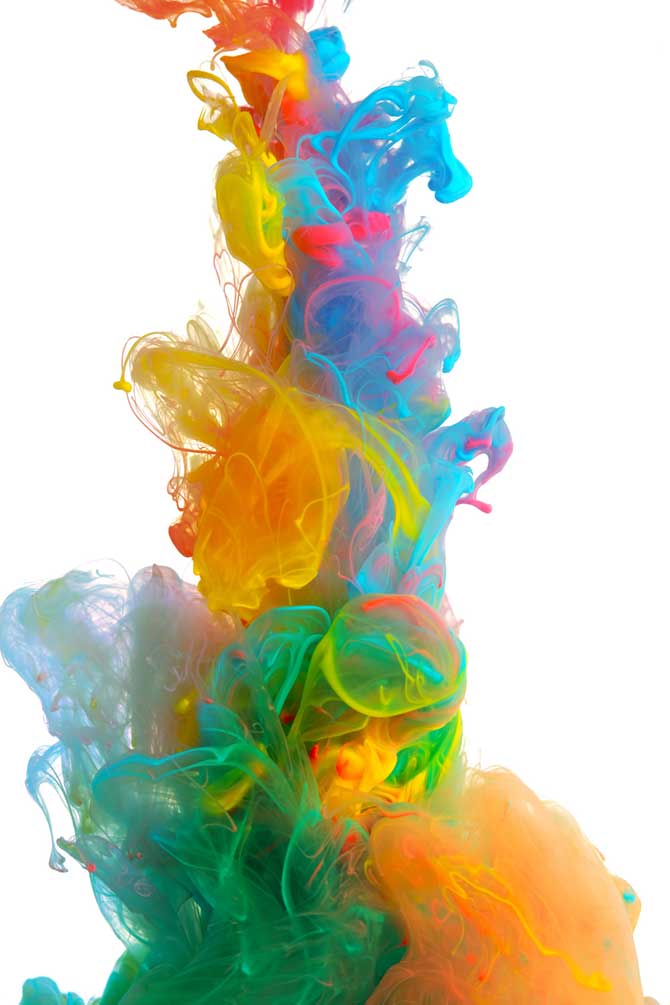
Abstract photography might reveal every detail of a subject or none. Getting right up close to something detailed or coloured provides a striking result. Concentrating on lines or curves then focusing in on them or blurring them can also create something special.
Photoshop is also an abstract artist’s fancy.
Anyone, from amateur to professional, can get abstract photography very right or get it very wrong.
Like other forms of abstract art, abstract photography can be bad if it has bad composition, no point of interest/focal point and poor finishing.
Here are 40 examples of amazing abstract photography to inspire you to pursue this area.
12. High-Dynamic-Range Photography
With HDR, you’re not just taking one photo. You are, in fact, taking three photos, taken at different exposures to achieve one ultimate photo.
HDR requires an advanced understanding of photo editing, but it’s a wonderful skill to aspire to and, like any other photographic form, takes practice and patience.
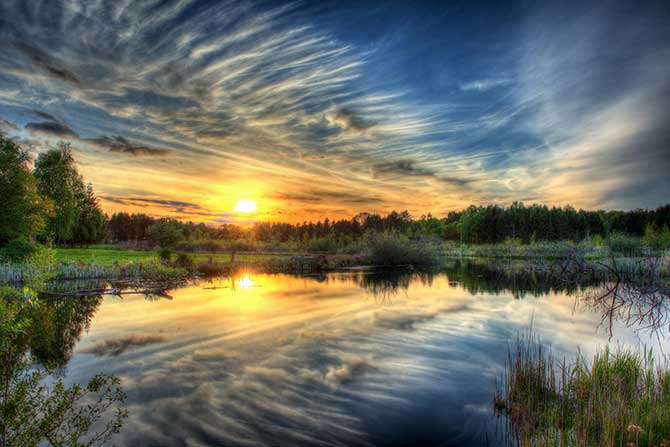
If you’re keen to learn more, Photoshop Café has a brilliant, step by step guide.
Now it’s time to take your 3 Ps – practice, passion and patience – and get started! Once you’re done, be sure to come back here and print your panoramic, abstract, landscape sunset in the rain onto a canvas print! Or maybe something a bit simpler. 🙂


